


If you are a professional developer — or a super organised hobbyist — you’re certainly using an issue tracker. Your team is all working off of tickets that the PM, Scrum Master or whatever figure you have in your team, puts down. Workflows might vary a bit, but in the end, you’ll spend a lot of time going back and forth between the code and the tickets.
And you’ll surely have gone through projects where you had to switch between tasks a few times a day — maybe QA found a bug, maybe the PM was on a panic spree and you had to drop everything and run to fix something you’d never heard of before. That’s stuff that happens quite often.
In all those cases, you have to go find out the issue in the tracker, understand it, then create a branch, go to the IDE, find the relevant files, and start working. And that would be repeated multiple times when switching between tasks.
But not anymore!
(Multi)Task
This week’s protip is about how to use a little known feature of JetBrains’ IDEs to minimise the back and forth. In Android Studio (or any other JetBrains’ IDE) you can use the Tasks & Contexts menu to define tasks and switch between them. A task in the IDE terms is defined as simply an activity you want to perform, which has a name. Every task has an associated context, which is the set of files open, the VCS branch, etc.
The IDE is initially in the default task, and the default context. When you switch between tasks, the contexts are switched as well for you (so each task has its own set of files and panels open). You can manually create and switch between different tasks and contexts, if you want to.
But we can do better!
Track ALL the things!
Android Studio has an awesome feature associated with Tasks: issue tracker integration. When you enable it, the IDE will grab all the tasks from your issue tracker (by default, all the tasks assigned to you, but you can change this). A wide array of trackers are supported, starting from JetBrains’ own YouTrack, to JIRA, GitHub, etc.
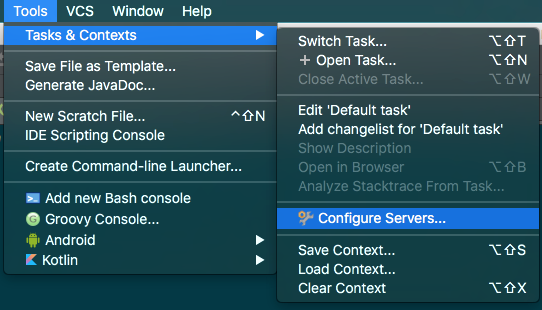
Let’s set up our issue tracker and see how this works! First of all, open Tools > Tasks & Contexts > Configure Servers:
In the Servers window we can setup one or more issue trackers. In our case we were attaching to a YouTrack instance:
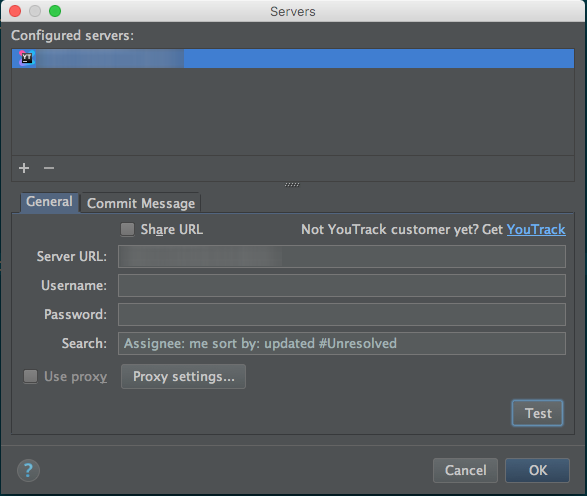
You can also specify a commit message template to use for changes originating within tasks coming from this tracker. If you want, hit the Testbutton on the lower right — you know, just in case. If you haven’t dun goofd, the IDE will tell you everything is working.
Small sub-tip for you!
If you have more than one project hosted at the same URL, you likely want to tweak the Search query to include a project filter. For example, using the JIRA integration, add this bit to the JQL before theorder byclause:and project=“XXX”, whereXXXis the project identifier, which you see as prefix for all your issue IDs.
For YouTrack, you’d write instead:Project: XXX
Time to get tasking!
Using tasks
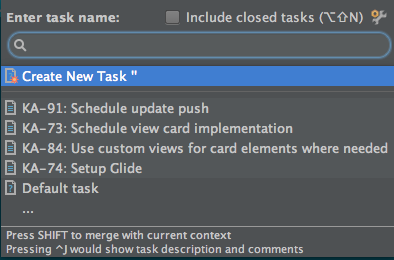
Invoke the Create task using Find action or simply with the Alt-Shift-N shortcut. The IDE will list the tasks you have assigned on the issue tracker:
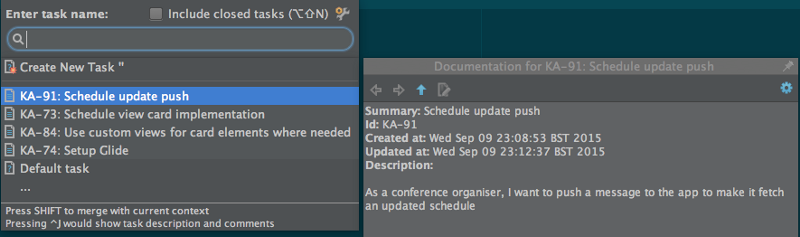
You can see the issue description and comments by pressing Ctrl-J:
Once you’ve picked an issue to work on, you can have the IDE update the ticket state for you, create a new context, a branch and a changelist:

In three clicks you have done all you need to setup the task and let everybody know you’re on it.
Oh, in case you were wondering, a changelist is the way the IDE has to allow you to simply work on separate sets of changes, as to prepare different commits. In this case it’s really useful as it will automagically contain the changes you do for a specific task into its own changelist that you can easily review.
Switcharoos
Now that we have tasks, switching between them is really easy. Just invoke Switch Task, or use the Alt-Shift-T shortcut:
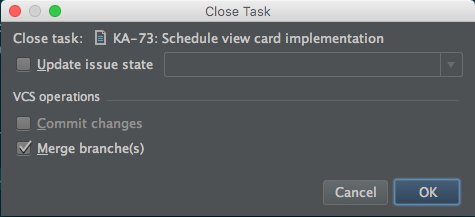
And that’s all you need to do! When you’re done with a task, Close active task is an Alt-Shift-W away:
Want to read more?
You can take a look at the other posts in this series.