


Grab your tools, we’re on to another adventure in XML-land!
In the first installment of this series, we’ve gotten to know the tools namespace. We’ve learnt that it can be used to override any attribute at design-time only, and that it can help us helping Lint. We mentioned that there are other things that the tools attributes can do for you as well.
This time we’re going to look at them.
UI attributes
All eight remaining attributes in the tools namespace are related to the UI preview pane of the IDE. That’s why I choose to call them UI attributes.
They’re not of much help outside of your IDE, but they can make things definitely simpler for you when you’re in it, designing some layouts XML. These attributes are:
tools:contexttools:menutools:actionBarNavModetools:listitem/listheader/listfootertools:showIntools:layout
The context attribute
The context attribute (formerly known as the activity attribute) is used to tell the IDE which Context your layout will be inflated into. This is useful because it allows the preview pane to automatically pick the theme to use for the preview.
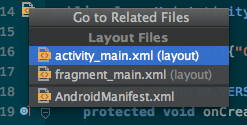
It can also help the Go to Related files intention in Android Studio, even though it has become pretty clever at figuring stuff out by itself.
The value of the attribute is the (fully) qualified name of the Activity in which the layout will be inflated into, and is applied to the root node:
<LinearLayout
  xmlns:android="http://schemas.android.com/apk/res/android"
  xmlns:tools="http://schemas.android.com/tools"
  android:id="@+id/container"
  android:layout_width="match_parent"
  android:layout_height="match_parent"
  android:orientation="vertical"
  tools:context="com.android.example.MainActivity">

  <!-- ... -->

</LinearLayout>
The menu attribute
The menu attribute is used to tell the IDE which menu(s) you want to show in your preview pane. It is applied to the root node of the layout.
The preview pane is already pretty smart about this, though. If you have attached your layout to an Activity (using the context attribute we’ve just seen), it will look into the onCreateOptionsMenu method to try and figure out which menu(s) you’re going to use. This attribute is there for when you need to override the default behaviour.
You can define one or more menu XML files in the attribute, by just writing their names. Interleave every menu with a comma, and omit any @menu/ or .xml.
tools:menu="menu_main,menu_edit"To show no menu, just leave the value empty:
tools:menu=""One last note on this attribute: it doesn’t work if you’re using a theme based on Theme.AppCompat.
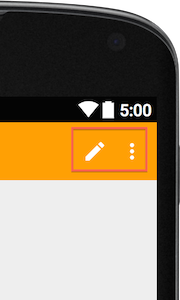
The actionBarNavMode attribute
This attribute tells the preview engine which kind of navigation is supposed to show up on your App Bar (the new Material name for the Action Bar).
The attribute can have one of these values:
standardtabslist
Here I am, once again with a caveat: this attribute does not work if you use a theme based on Theme.AppCompat (r21+, at least) or Theme.Material, or if you’re relying on an in-layout Toolbar. Only the App Bar that is provided by a Holo-based theme in the window decor is supported.
The listitem, listheader and listfooter attributes
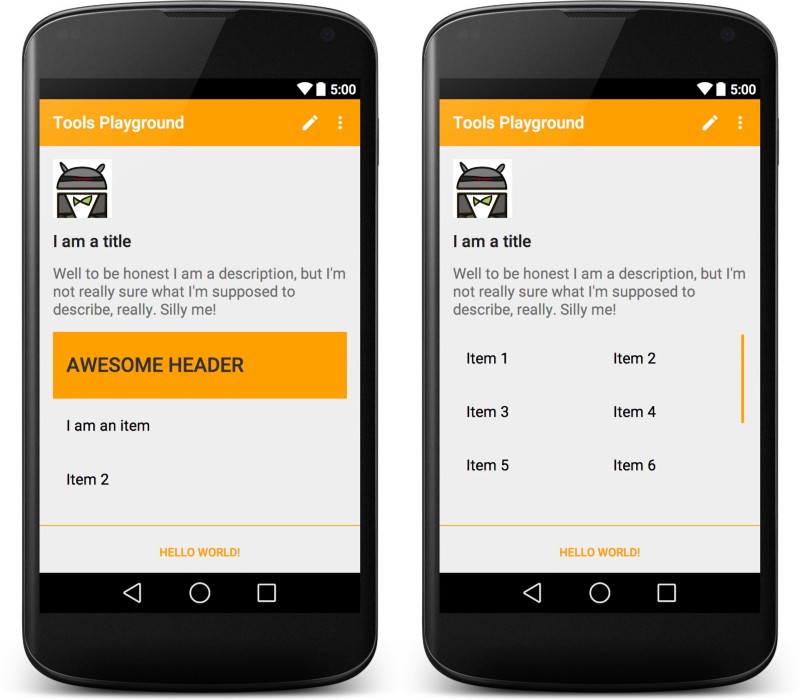
When you work with an AbsListView (the superclass to ListView, GridView and their lesser known sibling, ExpandableListView), the preview pane shows you a standard preview for your lists/grids.
Using the listitem, listheader and listfooter attributes you can specify the layout resources for the preview pane to use respectively for the list items, the header and the footer.
<GridView
 android:id="@+id/list"
 android:layout_width="match_parent"
 android:layout_height="wrap_content"
 tools:listheader="@layout/list_header"
 tools:listitem="@layout/list_item"
 tools:listfooter="@layout/list_footer" />
Which is awesome. But unfortunately doesn’t currently work. So it’s just potentially awesome, I suppose.
Errata corrige on the list* attributes
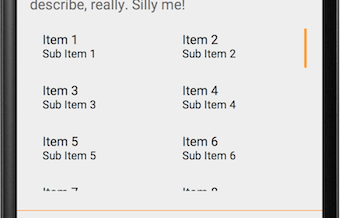
Contrary to what you just read, they do work, at least to a degree. Turns out I have been spelling the attributes incorrectly (there is no camel casing in the correct names, contrary to what I previously typed here) in my test project. If you change them to the correct spelling — e.g., listitem — they actually show up as intended. If you’re using a ListView.
Remember that header and footer can’t be set on a GridView, only the listitem attribute works there.
Oh and another thing, this of course won’t work for RecyclerView, as that doesn’t inherit from AbsListView.
The layout attribute
The tools:layout attribute is used to tell the preview pane which layout will be inflated into a fragment tag at runtime (in the onCreateView() method). This works similarly to the (unbound) layout attribute that you use for include tags.
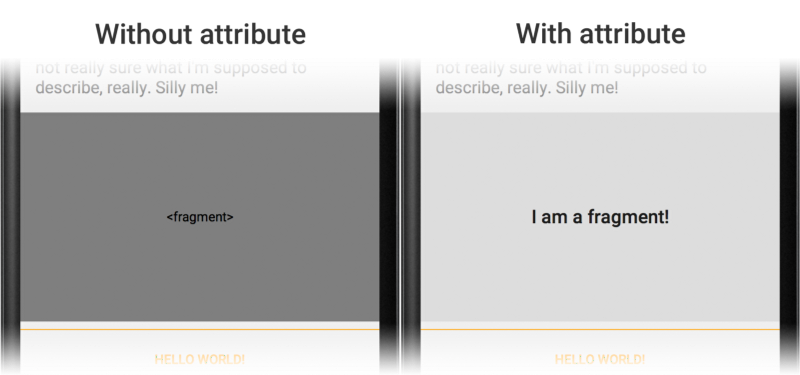
The difference between the two is that tools:layout is only used for previewing in the IDE the final state of the UI. Fragments don’t have a hard contract as which view they will inflate, at design time. Includes, on the other hand, need to specify it in the XML because the framework will recursively inflate the included layout(s) inside of the main layout at runtime.
The showIn attribute
The last attribute we find in the tools namespace is the showIn attribute. This attribute is used in the opposite way to the way the layout (unbound) attribute is. When you have an include tag and you specify a layout attribute on it, you’re saying to the framework what to inflate in that place.
But if you go and edit that included layout, you won’t have a context for it, it’ll just show up as if it were the root layout of an activity. With the showIn attribute you can tell the preview pane to show you the include into the context in which it will then be inflated. This is especially useful if your included layout has a merge tag as its root (which is treated as a FrameLayout by the preview pane).
<merge xmlns:android="http://schemas.android.com/apk/res/android"
 xmlns:tools="http://schemas.android.com/tools"
 android:layout_width="match_parent"
 android:layout_height="match_parent"
 tools:showIn="@layout/activity_main">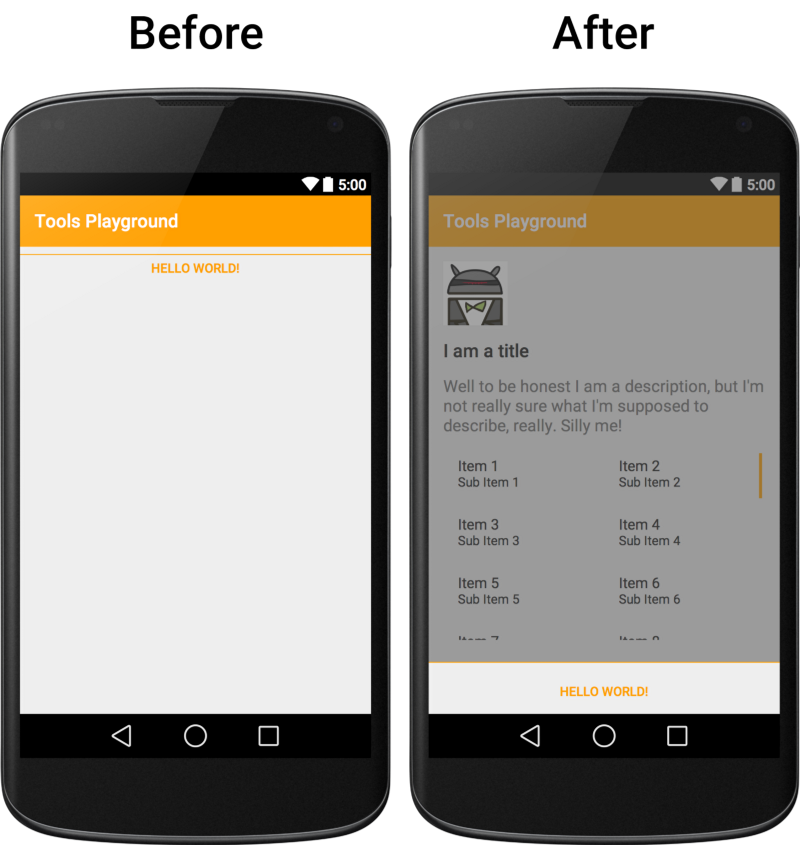
Wrap up (and tl;dr)
We’ve seen all the attributes and awesome functionalities, such as design-time overrides, that the tools namespace provides us. Now it’s time for you to start using them, to be a more productive developer — and why not, a happier one as well.
Don’t be a tool, use the tools.
Thanks to Daniele Bonaldo and Francesco Pontillo for proofreading.