
Most people are just fine with the integrated webcams in their laptops, because after all, if you're in a meeting where everyone uses their crappy built-in webcam and microphone, there's no point in doing any better. But what if you need to record or stream some quality content? Say, giving a talk, hosting a webinar, presenting something important...
Well in that case, you may find that the built-in webcam and microphone can be inadequate. My Macbook's webcam output for example is a blurry mess where everything is in focus, including the background. Sure, many apps now have a "blur background" effect, but it's never that good — especially when you have long hair or a complex background. What about the built-in microphone? That's also picking up noise from everywhere, including the laptop's own fan. Not great, even with the best noise cancelling solutions out there, although I have heard that Nvidia RTX cards can make miracles these days.
There is a simple solution to this problem: using better hardware. I'll show you what I have done, what I have purchased and what I had already at home, ready to use.
Improving the audio
First and cheapest thing to improve is the audio. The one thing that will make a world of difference, together with using headphones, is purchasing an external microphone. For best results, I recommend getting a condenser microphone with a shock mount and a pop filter.
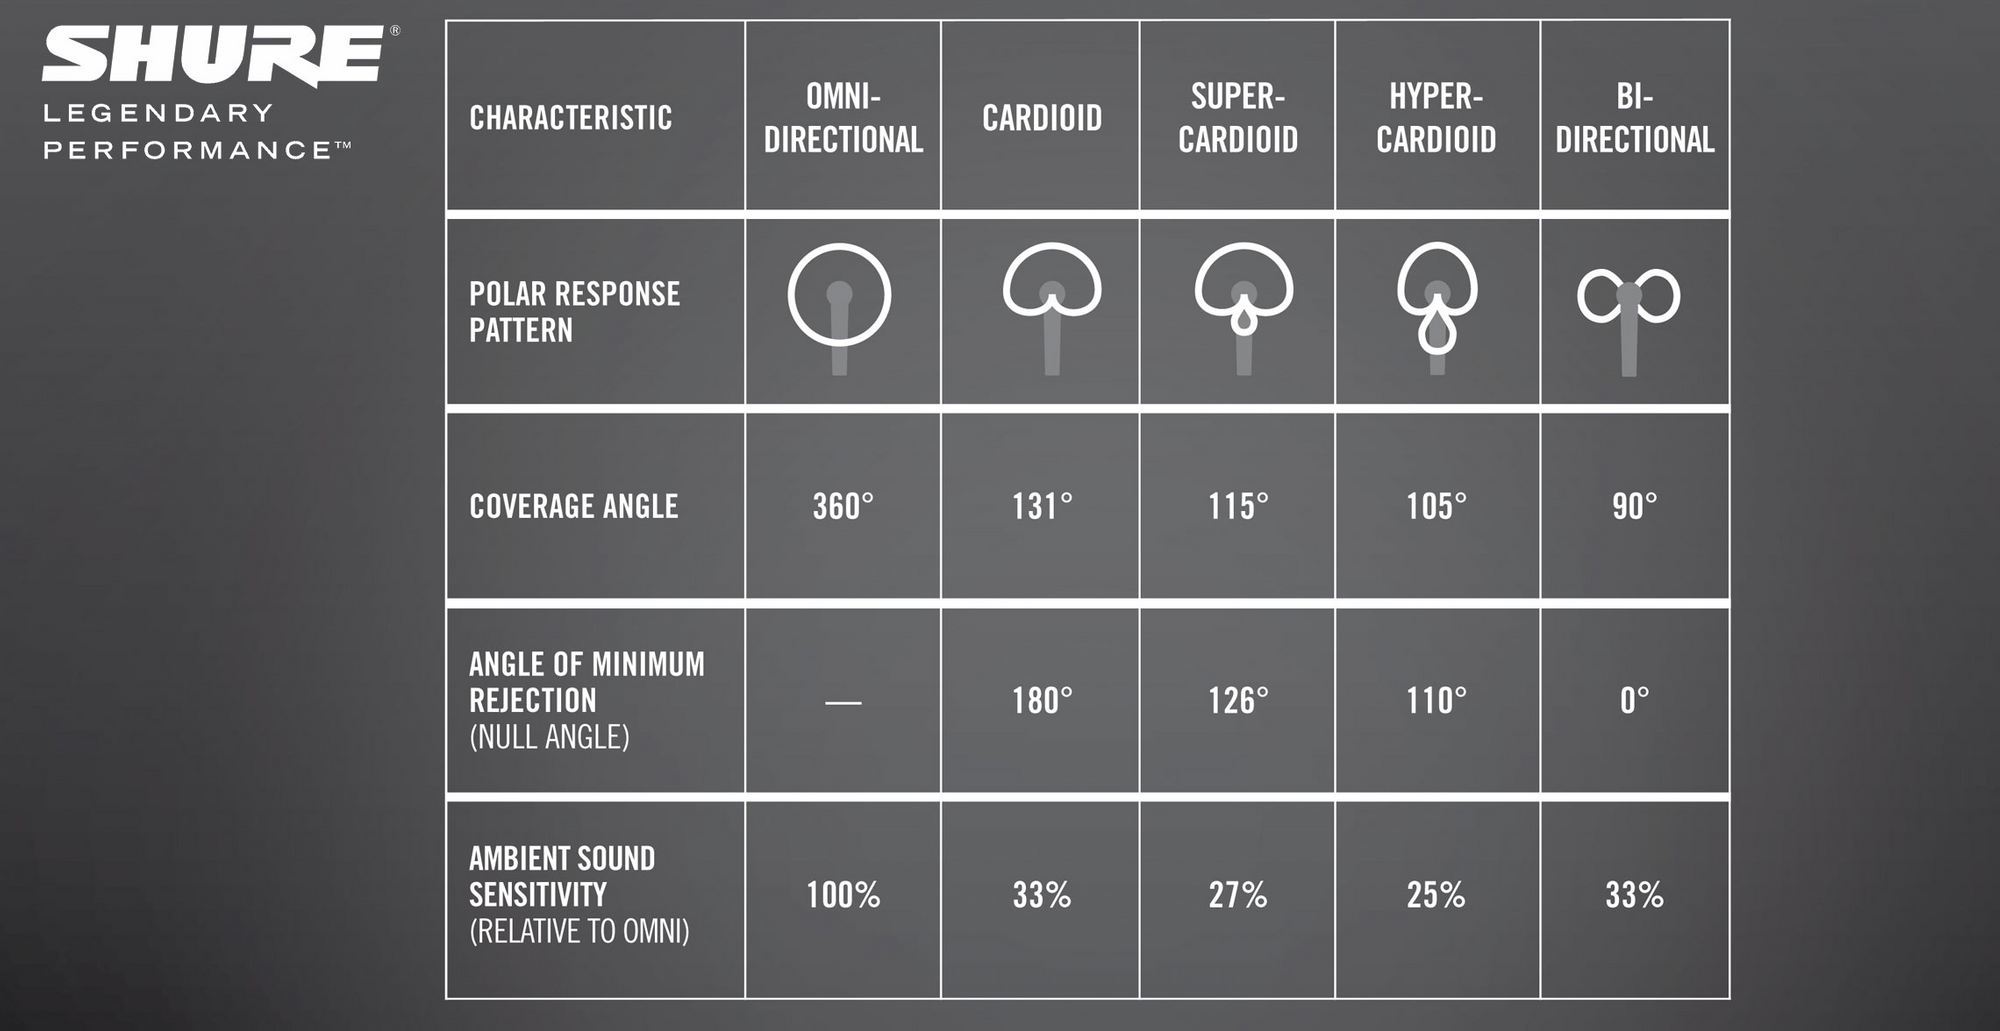
You'll want a condenser microphone for its superior quality. These mics generally come with a cardioid pick-up pattern, which means they mostly pick up sounds coming in directly in front of them. That is ideal if you want to reduce the amount of noise that gets recorded. I won't go into too much detail here, but you can read more on Wikipedia, or refer to this handy table, courtesy of Shure:
The shock mount is necessary to isolate the microphone from noise that reaches it in form of mechanical vibration. Sound is nothing but waves transmitted through air, or other means, so if a microphone is mechanically connected to something else, it can pick up vibrations such as those caused by pressing keyboard keys on the desk, steps, and even traffic passing outside the window. A shock mount decouples the microphone mechanically from its stand, lessening or eliminating these spurious vibrations.
The pop filter is useful to remove or reduce the "popping" sounds we make when we speak — think of the sound a p makes. These sounds move a lot of air and can saturate the microphone input, making it nearly unsalvageable in post production.
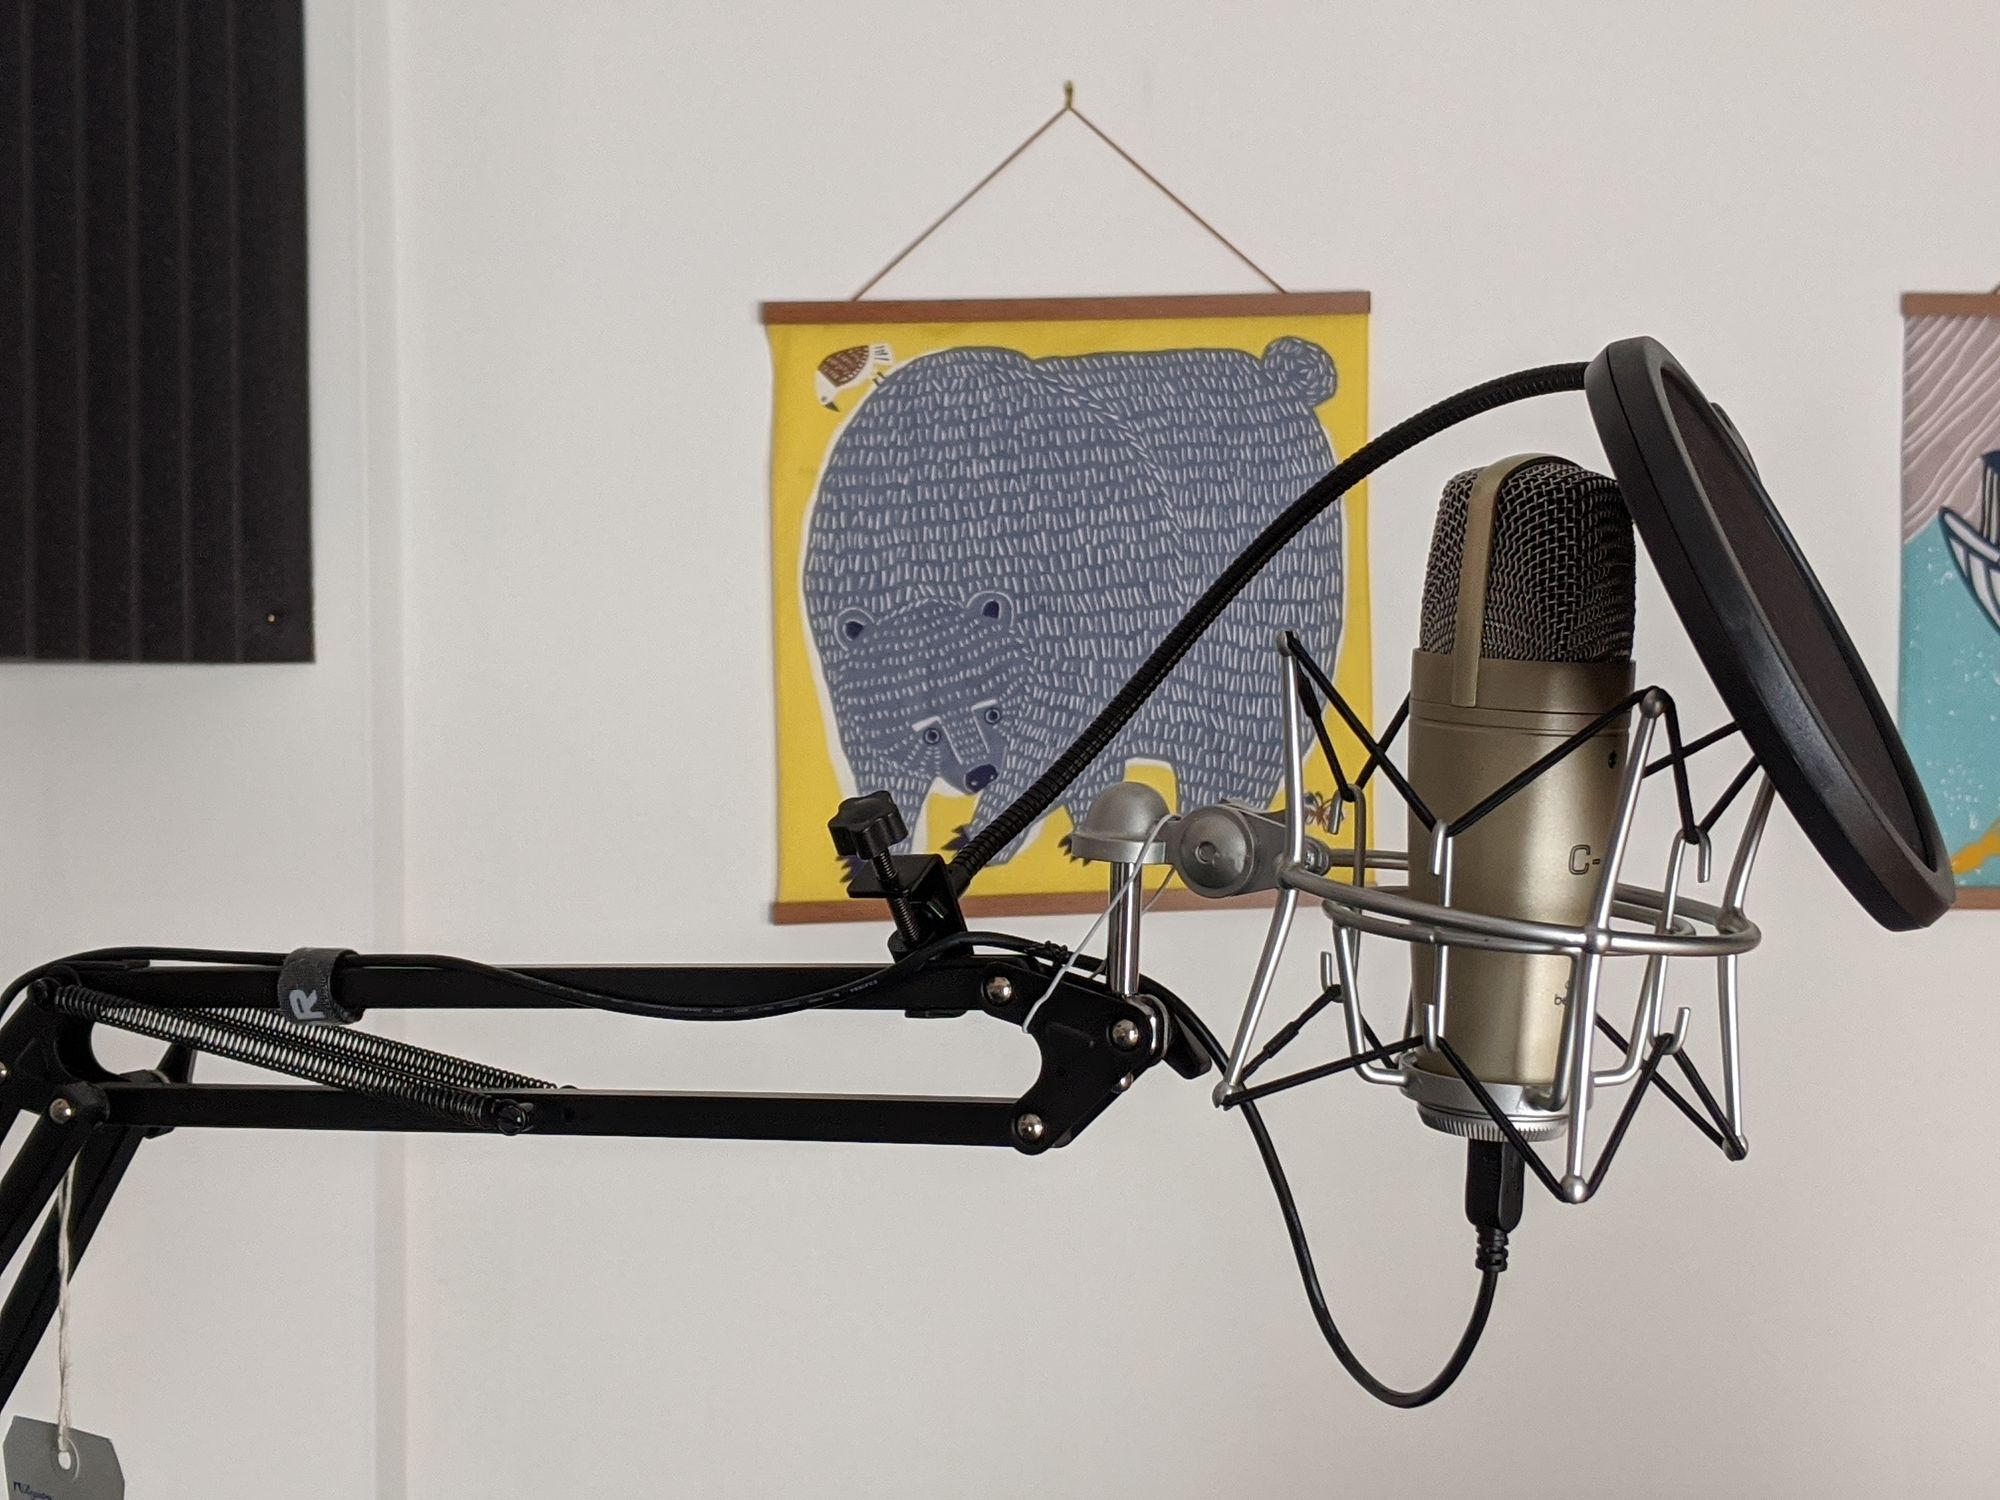
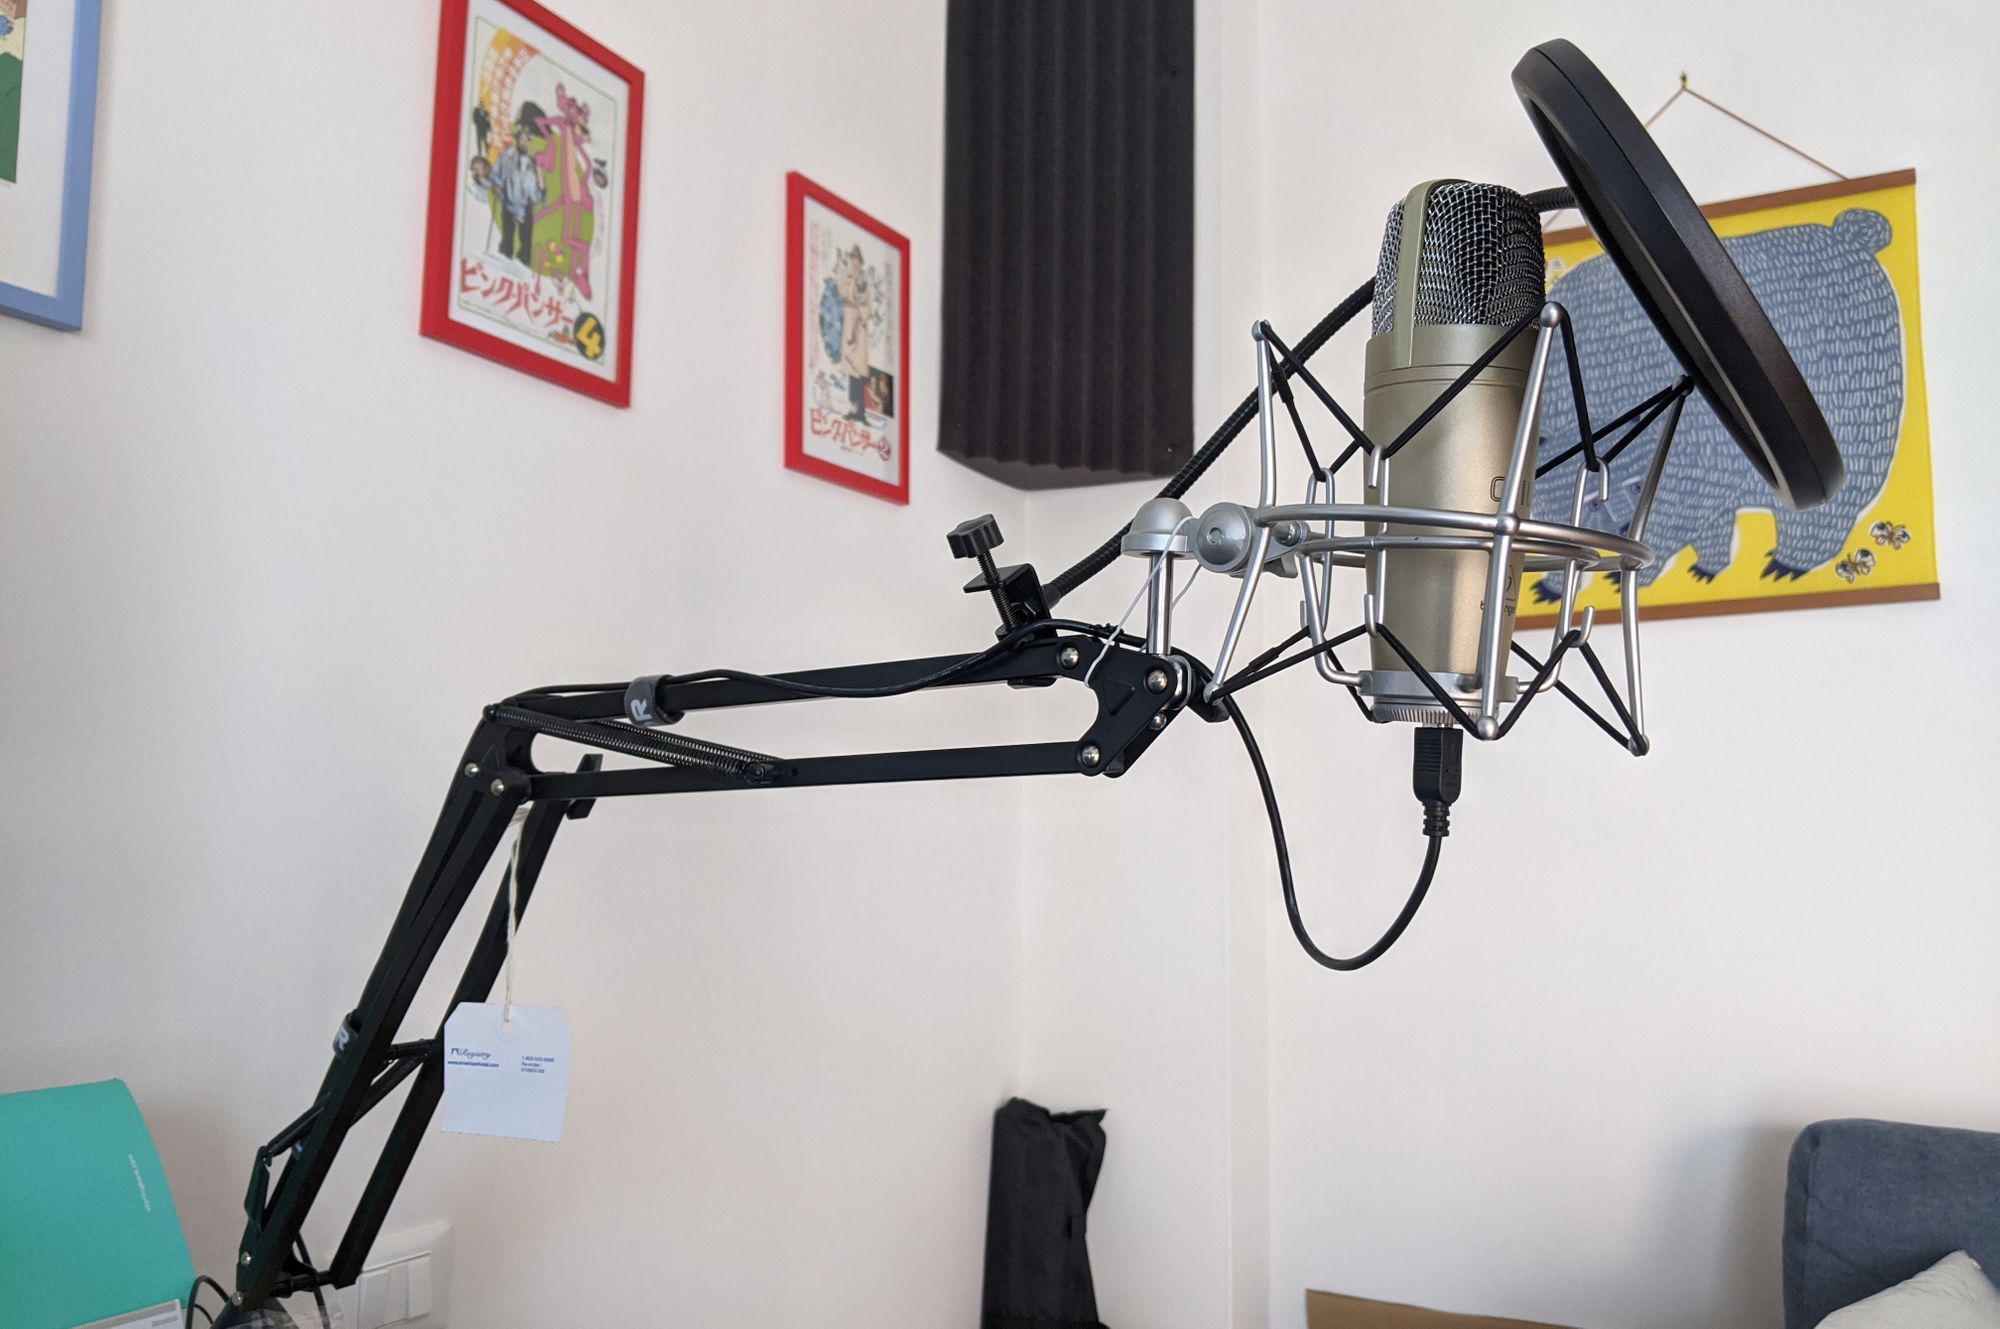
You can find a decent USB microphone for around 50€, a mount for around 20€ and a pop filter for about 15€. In my case, I also got a microphone arm, so I can free up some space on my desk, and a fancier mount. In case you were wondering, here's my setup:
Note that the microphone box may not include the required USB-B to USB-A cable (the same cable you'd use to plug in a printer). You can find them easily if you need one, though.
Setting them up is super fast and easy. You screw the mount onto the arm, then the mic onto the shock mount. Attach the pop filter. Connect the mic to your computer using a USB-B to USB-A cable, select it as your input device, and voilà. Better audio is served!
You can also do without a dedicated microphone arm if you don't want or need it; some microphones come with a table support already, but if that's not the case (such as with the C1-U) you can simply purchase one.
Audio tips
In your system preferences, you can set the microphone gain. Some nicer microphones have a physical knob to set it, but for cheap ones like the C1-U you have to rely entirely on software. On macOS, for example, you set the input volume from the Sound preferences. It looks like this:
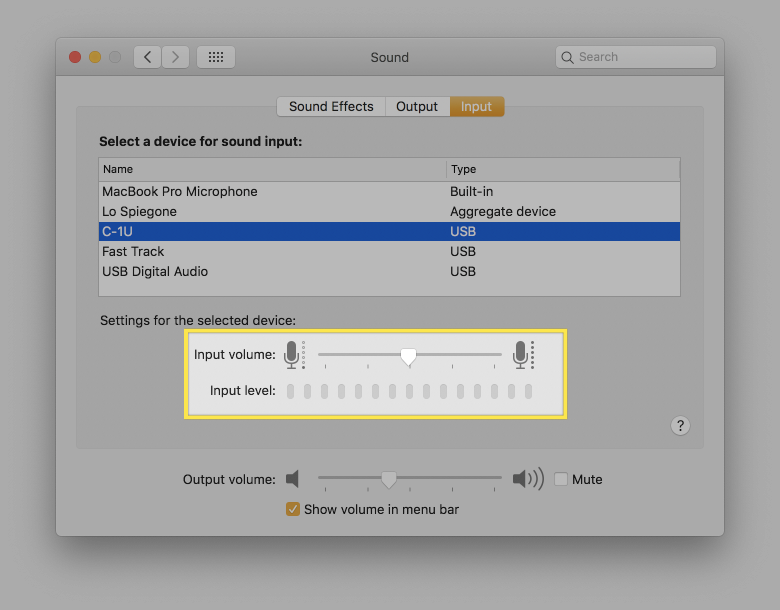
You should aim at having a low enough input volume — aka microphone gain — so that you maximise the amount of voice it picks up, while not picking up much noise. In particular, if your gain is too high, you'll start hearing the internal noise the microphone circuits generate. You can notice because when you record silence, the input is never truly silent; in that case, you should reduce the gain until the noise disappears.

One last tip: try to avoid or suppress reverb. It's one of the largest degradation factors for your audio, together with noise. When you have large flat surfaces (e.g., walls, screens, wardrobes) in the room around your microphone, the audio waves bouncing on those surfaces and reaching the microphone with a slight delay generate reverberation, also known as reverb. There's several ways to reduce it, and the most obvious is avoiding hard, flat surfaces. For example you should use a room that has as much irregularly-shaped furniture as possible. Fabrics are also good dampeners, so carpets and curtains do help.
In my case, my studio room has a sofa and a curtain on the window, plus some fabric furoshikis on the walls, but that wasn't enough: I was still picking up tons of reverb. So I purchased some phono absorbing panels, and put them on the walls. Even though I placed them semi-randomly, as I am no expert, it made a tremendous difference. You can read up online to get some info on how to place them, but the idea is that you want to disrupt direct sound reflections that may be picked up by the mic.
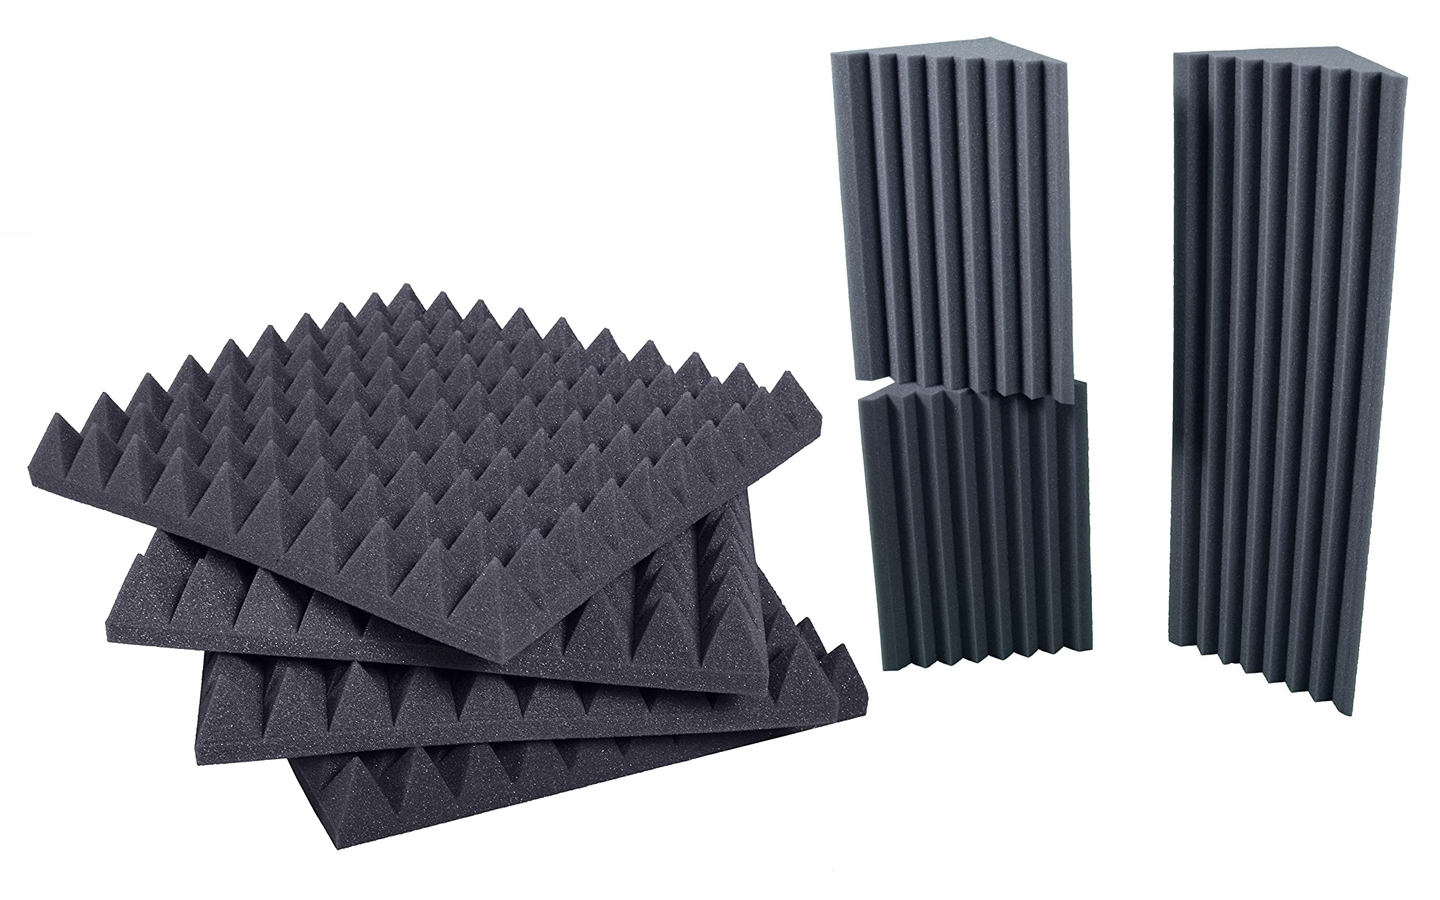
In my case, I bought some flat sound absorbing panels and some bass traps. The former are useful for absorbing high and medium frequencies, and are placed flat on walls, while the latter absorb the bass components and are placed in room corners. I placed the flat panels behind my screens, on the walls on the side of the mic, and on the ceiling directly above it. I also put a few on some thick cardboard panels so that I can add more when I need better quality (e.g., to put in front of my screens, and on top of the desk).
Improving the video
Now that audio is all set, the next item to take care is video. In my case, I worked with what I already had: a Sony Alpha 7 Mk 2, and a set of lenses. No point in buying something when you can use what you already have, of course, but if you don't own it already it's probably a bit overkill to use as a webcam.
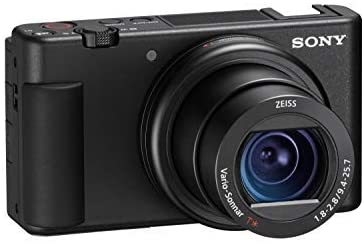
You can either buy a high quality webcam, such as the Logitech Brio, or a compact camera. If you buy a high quality webcam, you're mostly set on the camera side. If you prefer something you can also use to take beautiful shots outdoors, then you can lean on a good compact camera such as the brand new Sony ZV-1, or maybe something cheaper such as a Sony HX-80. Anything goes, as long as it has a fast lens (you should look for something with a max aperture of f/3.5 or larger — that is, a smaller number) and some form of HDMI output.
You may be wondering, why do we need those specs? In the case of the lens aperture, it's because the larger the aperture, the narrower is the depth of field, which in practical terms means that the background will be blurrier. No need for poor quality, CPU-hungry software blur effects!
The larger the maximum aperture the lens can get to, the blurrier the background will be. But there's a side effect: the in-focus area in front of the lens gets narrower and narrower as the aperture widens — that's what makes the blur. A very simplified (and quite inaccurate) animation helps understand better:

In my personal experience, an aperture between f/3.5 and f/5.6 in a well-lit environment (more on that later) produces a deep enough in-focus area that you are not risking moving out of it by just shifting around, while keeping a blurred enough background that it's visually separated from the foreground subject.
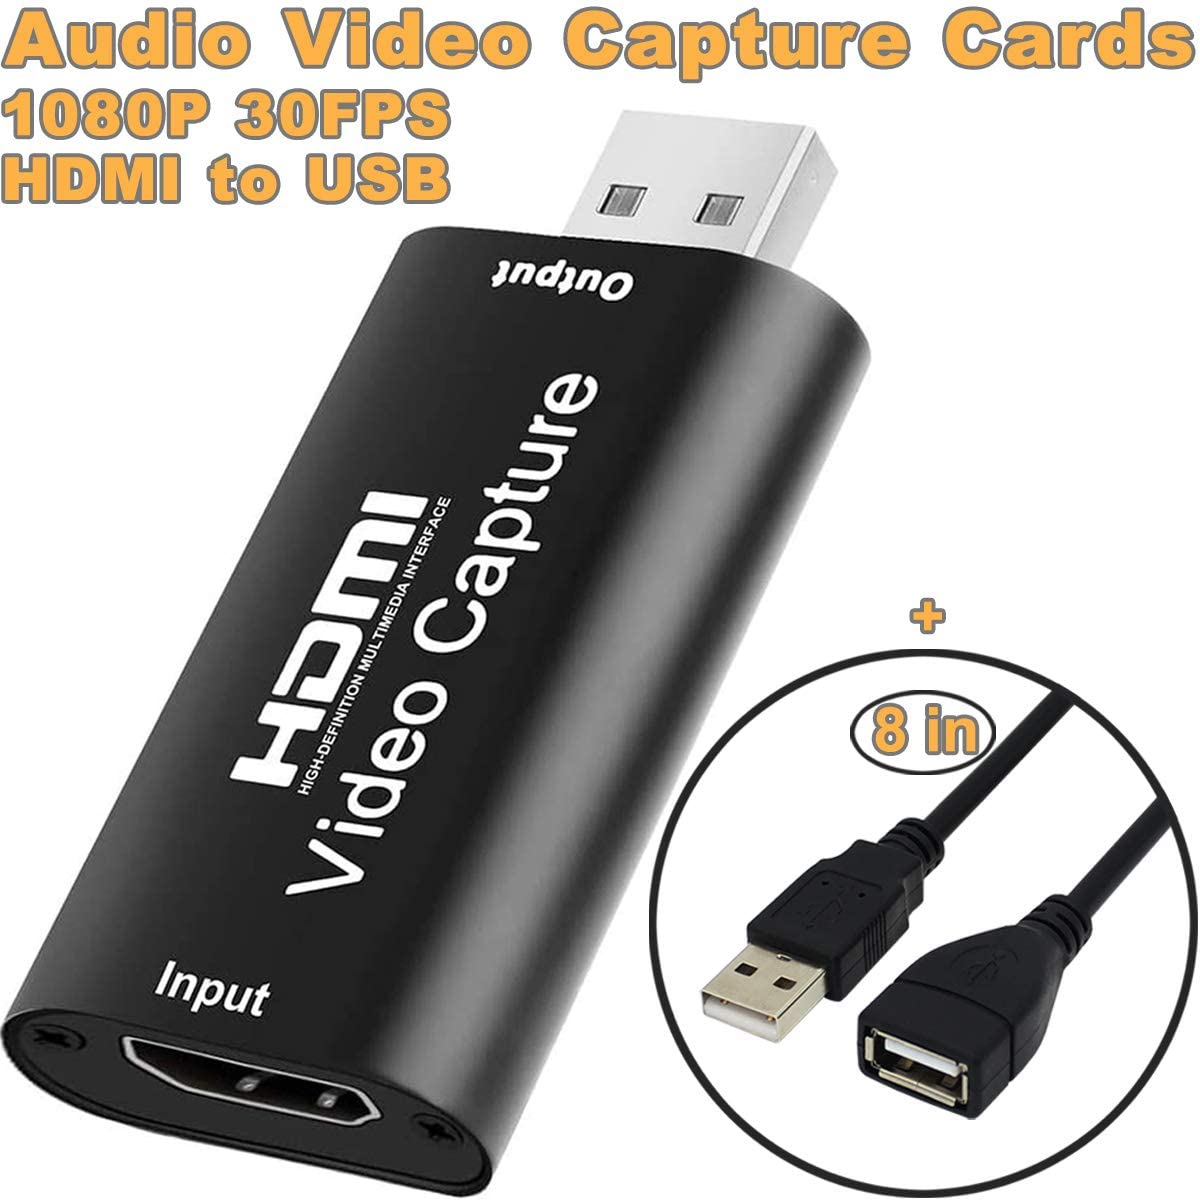
Now that we have the camera setup nailed down, we need to figure out how to use the camera itself as a webcam. There's different ways to do it, some using the camera's own remote control software in conjunction with something like OBS and other virtual camera software, but the most convenient is by far an HDMI capture card with the ability to present itself as a USB camera. I got a cheapo 1080p HDMI capture card and connected it to the HDMI output of my Alpha 7 with a micro-HDMI to HDMI cable I got on Amazon. If you only plan to use the dongle for this, you won't need a fancy dongle, since you're unlikely to ever stream or record the camera input over 1080p 30fps, and you don't need to care about things like HDCP compliance, which may be required for capturing other sources.
Once connected to my Mac, it simply showed up as a webcam and all I needed to do to use it was to select it as the webcam in the software — it works with Meet, Zoom, Skype, and every other service and software out there.
Depending on your camera settings, you may need to do one last thing: disabling shooting information to be overlaid on the HDMI output. That setting was on by default on my Alpha 7, but it's easy enough to disable. Refer to your camera's instructions manual for the specifics on how to do it as the procedure changes based on camera make and model. Sony offers a number of suggestions on the optimal settings to use their cameras as webcams, and they're mostly great. I found using Continuous AF can produce a very distracting "lens breathing" effect as the camera chases the subject's focus, so I'd recommend using Manual Focus if you experience this issue.
One last thing: if you don't already have one, you'll most likely need to get a tripod to mount your camera on. I am using my Manfrotto Befree, because that's what I already had, but you can get away with something much cheaper if you're only planning to use it for this.
Video tips
Just like a good microphone in and by itself is not enough, a good camera by itself won't be enough. When it comes to image quality, similarly to what happens with audio, you will likely have to make some other adjustments to the environment to get the best results.
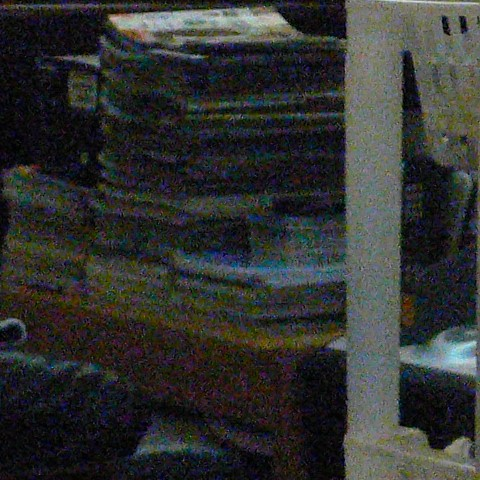
The first thing to deal with is visual noise. This noise comes from a variety of factors, and presents itself in a number of ways. Visual noise is particularly apparent when an image sensor needs to ramp up its sensitivity, also known as ISO value, and that generally happens when the subject is dark. When you're streaming video, much of the noise is likely to be lost due to the video compression, in any case, but if you're recording, or if your stream is high quality (720p or more), then you'll want to look into doing something about noise.
Your computer's webcam is likely applying strong noise reduction, that results in the image being muddy and with little in the way of detail. This is generally ok for video calls as the video quality itself would produce similar results, but it does produce low quality results in any other scenario. Cameras, on the other hand, are way less aggressive with noise reduction, as they probably assume users will likely prefer to have control and apply higher-quality noise reduction in post-production. This can result in a noisier image being produced by your camera when looking at directly captured video, since there is no post-production step. The first recommendation is to always use the camera in video mode, since that will enable at least some noise reduction, and inform it to produce a stream with a consistent frame rate, at the expense of other adjustments which would be preferable for photography.

The second recommendation is also quite simple: light yourself up well. The more light there is, the lower ISO setting the camera can use, and the less noise the image will have. Investing in a cheap ring LED light to put above the camera, or around the camera lens, is enough to make a big difference. Placing the light right in front of yourself will make sure your face is properly lit, but requires some care as to avoid overexposing and overly harsh lighting. Ideally, you'd want to have a diffuse light source in front of you, so if you can bounce the light against a white wall instead of pointing it directly at yourself, you'll get a much nicer result.
If you want to further improve your results, you can splurge on an extra light, to use as key light — that is, to put behind you to create starker lines around you and get better separation from the background. This light is meant to be a direct light in most cases, although you should play with intensity to avoid creating an overwhelming effect.

In my case, I purchased a Neweer LED video light and a 12V/2A power supply. The light is not incredibly powerful but it's a good bang for the buck, and it is good enough for my setup. As long as you buy a white LED light, possibly with the ability to dimmer it and/or to set its temperature, anything works. My video light is meant to be attached to a tripod or to the camera hot shoe mount; in my case I attach it to my old Gorillapod, so I have a lot of flexibility on where to put it. That way I can put the key light on the back of a chair, or on a vertical stand.
If you want to be particularly fancy, you can even get coloured sheets of plastic, called gels, to put in front of your key light. You can easily find a pack of gels for around 10–15 €, and it'll get you some very nice key light effects.
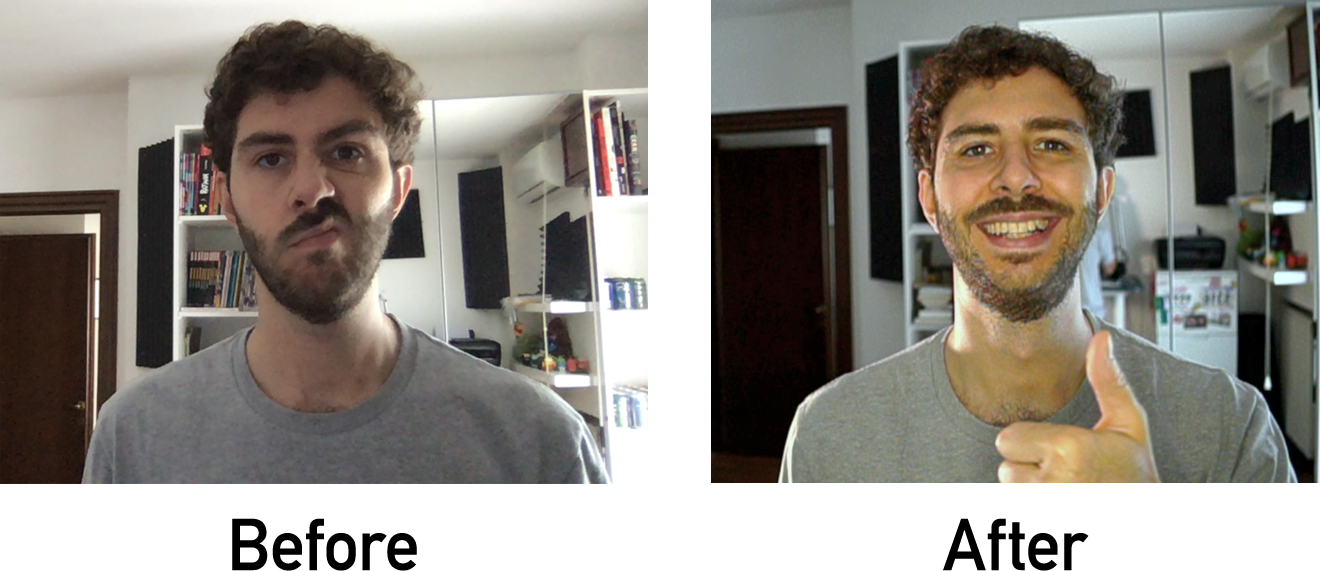
You can see the end result is quite remarkable, compared to what you'd get without everything else:
Conclusions
I surely went down the rabbit hole when building my home studio A/V setup. If you only do video calls, you probably won't need most of the video stuff — although I recommend getting a ring light anyway if you work at a desk at home. A decent microphone with a shock mount and a desk tripod will get you the most bang for the buck, especially when paired with headphones.
But if you record any audio or video content, or if you host talks, webinars or anything similar from your home studio, improving your setup will make a world of difference not just in the perceived professionalism of your content, but also in the quality and fruibility of what you produce.
It obviously doesn't make sense to purchase a whole photography kit to use it as webcam, but if you already have one, why not repurpose it and make out even more out of your investment? And if you don't have one, even a decent compact camera will make an infinitely better video source than even the best webcam out there — except maybe if you have something insane like a Logitech Brio, but then again, that costs like a great compact camera, minus the flexibility to use it as a camera.
I hope my post inspires more folks to (gradually) build a better setup at their place. I know it's expensive and I know it's not for everyone (or most), but if you are intrigued and end up doing something like this, do let me know!
Thanks to Mark Allison and Daniele Conti for proofreading ❤️